Epoxy Wood Filler: A Complete Guide for Everyday Homeowners

Wood is one of those materials that makes a home feel warm and alive. But as much as we love it, time, moisture, and simple wear and tear can leave it cracked, chipped, or damaged. That’s where epoxy wood filler steps in—a practical, long-lasting solution that many homeowners swear by. Whether you’re restoring an old window frame, patching up rotted boards, or refinishing furniture, this handy compound often feels like giving wood a second life.
In this guide, we’ll explore everything you need to know—from what epoxy wood filler is and how it works to step-by-step repair techniques and expert-level tips. Think of this article as your friendly, go-to manual for making your wooden surfaces look new again.
What Is Epoxy Wood Filler?
Epoxy wood filler is a two-part compound typically made up of resin and hardener. When the two are mixed together, they form a thick paste that cures into a rock-solid, durable material. Unlike simple putty or lightweight fillers, epoxy doesn’t shrink, crack, or crumble. It bonds tightly to the wood and becomes a permanent part of the surface.
In simple terms, it’s like giving your damaged wood a superhero upgrade—stronger, tougher, and more resilient than before.
Why Do People Choose Epoxy for Wood Repair?
There are many fillers on the market, but epoxy stands out. Why?Because it doesn’t just fill empty spaces— it restores the wood’s strength from within. Imagine having a small hole in a wooden door. A putty might fill it temporarily, but epoxy can actually restore the structure itself.
Here are some reasons people prefer it:
Superior Strength
Epoxy doesn’t just sit on the surface; it fuses with it. After it fully hardens, the material becomes strong enough to be drilled, sanded, and even support heavy weight.
Moisture Resistance
If you’re repairing outdoor furniture, wooden decks, or bathroom trim, this resistance is crucial. Moisture damage is one of wood’s biggest enemies, but epoxy stands strong against it.
Versatility
Need to fix a rotted window sill? Or repair a wobbly chair leg? Or restore a carved detail in a vintage frame? Epoxy adapts to it all.
Longevity
With proper application, repairs can last for years—sometimes decades. It’s one of those solutions that feels like a future-proof investment.
Common Uses of Epoxy Wood Filler
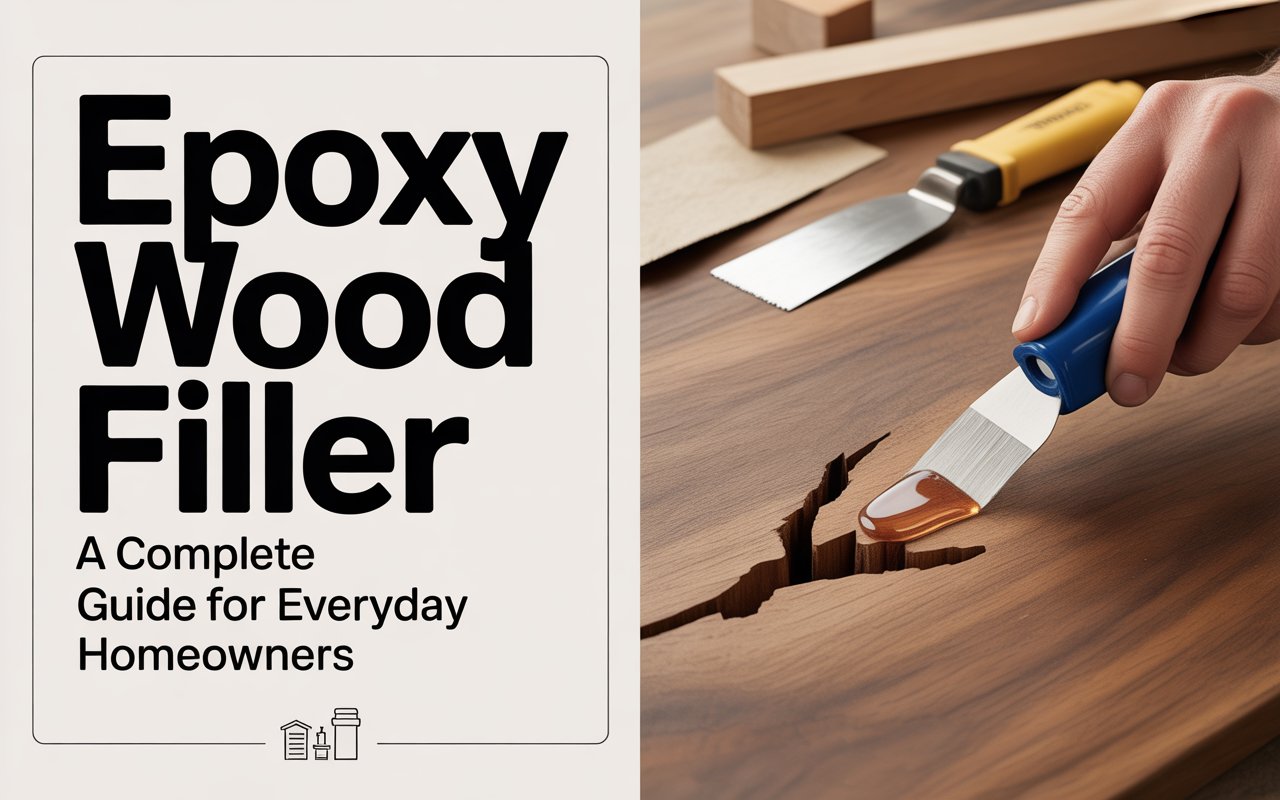
Epoxy wood filler is practical in more situations than most people realize. Here’s where it shines:
1. Repairing Rotted Wood
Rot is often seen as the end of the line, but epoxy can save the day. By removing the soft, decayed portions and filling the area, you can restore the original shape and strength.
2. Fixing Cracks and Splits
Wood naturally expands and contracts over time, leading to cracks. Epoxy fills them without shrinking later.
3. Rebuilding Missing Sections
Broken corners, chipped edges, missing trim—epoxy makes it possible to sculpt these parts back into place.
4. Surface-Level Repairs
Small dents, scratches, and voids can be leveled out smoothly with epoxy.
5. Furniture Restoration
Antiques, heirlooms, and favorite pieces benefit greatly from epoxy’s structural integrity.
6. Door, Window & Exterior Repairs
Outdoor trims, posts, and frames often need epoxy due to constant exposure to the elements.
How Epoxy Wood Filler Works
If you’ve ever baked a cake, you already understand the concept. You combine ingredients, mix them thoroughly, spread them into shape, and wait for them to set.
Epoxy uses the same idea:
-
Mix the resin and hardener.
-
A chemical reaction causes curing—the mix becomes thick and hard over time.
-
It bonds to the wood and forms a durable surface.
-
Once fully hardened, you can sand, saw, or stain it like natural wood.
This chemical transformation is what gives the filler its strength. It’s sort of like turning soft clay into stone.
Types of Epoxy Wood Fillers
Not all epoxy fillers are created equal. Depending on your project, you may choose from several types:
➤ Paste Epoxy
Thick and sculptable; ideal for rebuilding or shaping.
➤ Liquid Epoxy
Thin enough to soak into rotted areas, strengthening the wood fibers.
➤ Stainable Epoxy
Designed for surfaces where matching wood tone matters.
➤ High-Strength Structural Epoxy
Used for weight-bearing repairs or joint reinforcement.
➤ Marine-Grade Epoxy
Perfect for boats, docks, or wet environments.
What Tools Do You Need for Epoxy Repairs?

Using the proper tools can turn a challenging task into a smooth and efficient process.Here’s a basic checklist:
-
Putty knife or scraper
-
Sandpaper (medium to fine grit)
-
Mixing board or disposable container
-
Gloves
-
Utility knife
-
Clamps (optional)
-
Wood hardener (if dealing with rot)
-
Paintbrush for liquid epoxy
-
Dust mask
Keeping these tools nearby ensures your repair work goes smoothly and without frustration.
How to Prepare Wood Before Applying Epoxy
Imagine painting a dirty wall—it won’t look good. The same idea applies here. Preparation is key.
1. Clean the Area
Remove dust, loose debris, paint chips, or old filler.
2. Remove Soft or Rotted Wood
A chisel works well for this. Epoxy adheres best to solid material.
3. Dry the Surface
Moisture interferes with bonding, so let the surface air out.
4. Apply a Wood Hardener (Optional)
This step is especially useful for rotted areas. It reinforces surviving fibers.
5. Roughen the Surface
Light sanding improves grip.
Step-by-Step Guide: How to Use Epoxy Wood Filler
Let’s go through the process from start to finish:
Step 1: Mix Resin and Hardener
Follow the packaging instructions. Epoxy usually cures quickly, so mix only what you need.
Step 2: Apply the Mixture
Use a putty knife to press it into holes or shape it onto edges.
Step 3: Sculpt or Build
While still pliable, mold the epoxy to match the wood’s shape.
Step 4: Allow It to Cure
Cure time varies—some epoxies harden within 20 minutes; others need 24 hours.
Step 5: Sand for Smoothness
Once fully hardened, sand the area until flush with surrounding wood.
Step 6: Paint or Stain
Most epoxy accepts paint well; stain compatibility varies, so test first.
Tips for Achieving a Professional Finish

Even beginners can get pro-quality results by following a few simple tricks:
Work in Layers
Thick applications can trap air or sag. Thin layers allow precision.
Avoid Overmixing
Mix gently and carefully to reduce bubbles.
Use Plastic Tools
Epoxy doesn’t stick to plastic as strongly, making it easier to shape.
Heat Can Speed Curing
Warm temperatures help the epoxy harden faster—but don’t overdo it.
Use Tape for Clean Edges
Painter’s tape helps create crisp lines around the repair.
Common Mistakes to Avoid
Even experienced DIYers slip up sometimes. Here’s what to watch out for:
Applying Epoxy to Damp Wood
Moisture weakens the bond and leads to future damage.
Mixing Too Much at Once
Epoxy heats up and hardens quickly—use small batches.
Sanding Too Soon
Premature sanding ruins the surface and clogs your paper.
Skipping Surface Prep
Poor prep = poor adhesion.
Not Matching the Grain
If you’re repairing a visible area, sculpting the grain pattern improves realism.
How Long Does Epoxy Wood Filler Last?
With proper application, repairs can last 10–20 years or more, especially indoors. Outdoor surfaces may see slightly shorter lifespan due to sun and moisture, but still far outperform simple putties or fillers.
Think of epoxy like dental work: do the job right, and it lasts a long time.
Is Epoxy Safe to Use?
Epoxy is generally safe when used correctly. However:
-
Wear gloves to avoid skin irritation
-
Work in a ventilated area
-
Do not inhale fumes directly
-
Avoid contact with eyes
Once cured, epoxy becomes inert and harmless.
Painting and Staining Over Epoxy Filler
Painting is usually easy, but staining requires a little finesse. Because epoxy lacks natural wood grain, stain can appear blotchy or darker. You can solve this by:
-
Using stainable epoxy
-
Applying gel stains
-
Tinting epoxy before application
-
Adding a wood-textured topcoat
For painted surfaces, epoxy blends seamlessly.
Epoxy Wood Filler vs. Other Fillers
Is epoxy always the best choice? Not necessarily. It depends on the project.
Latex or Water-Based Fillers
Great for small indoor repairs—but not strong enough for structural fixes.
Wood Putty
Soft and easy to use, but shrinks over time.
Polyester Fillers
Fast curing but less flexible than epoxy.
Epoxy
The best option for major fixes, rot repair, outdoor use, and structural reinforcement.
Best Applications for Beginners
If you’re new to epoxy, start with simple tasks:
-
Filling nail holes
-
Repairing chipped furniture edges
-
Fixing minor rot on outdoor trim
-
Leveling cracks on tabletops
These projects help you gain confidence without overwhelming complexity.
Conclusion
Epoxy wood filler is more than just a simple patching material—it’s a transformative tool. It fixes structural problems, saves old wood from being thrown away, and brings dull or damaged surfaces back to life. Whether you’re repairing a family heirloom or restoring your home’s exterior, epoxy offers durability, strength, and reliability that few other fillers can match.
If you’ve ever looked at damaged wood and felt unsure about what to do next, now you have the perfect solution in your toolkit. Your furniture, trim, doors, and outdoor woodwork can all enjoy a fresh start with the help of epoxy.
FAQs
1. Can epoxy wood filler be used outdoors?
Yes, it performs extremely well outdoors because it resists moisture, weather, and temperature changes.
2. Can epoxy filler hold screws or nails?
Absolutely. Once cured, epoxy becomes strong enough to accept screws, nails, and even drilling.
3. How long does epoxy wood filler take to cure?
Most types cure within a few hours, but complete hardening can take up to 24 hours.
4. Can epoxy be sanded smoothly?
Yes, epoxy sands beautifully once hardened, creating a seamless surface.
5. Will paint stick to epoxy filler?
Paint adheres very well to epoxy, making it ideal for visible surface repairs.






Post Comment